
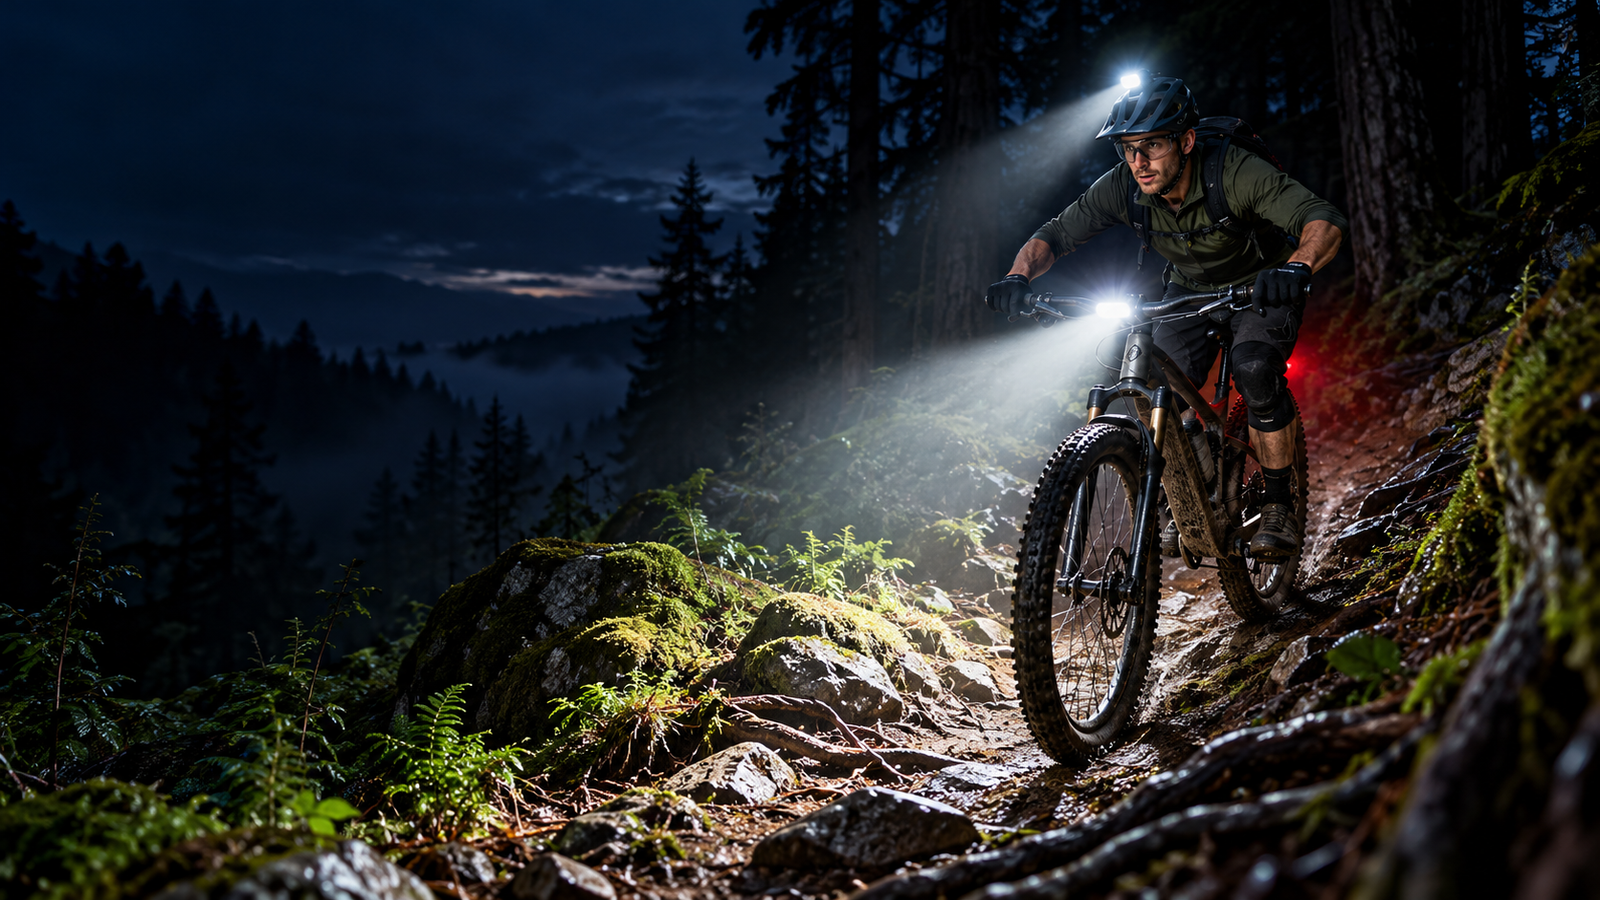
How to Choose Bike Lights for Night Riding on MTB Trails
Choosing the right bike lights for night mountain biking is about more than buying the brightest model available. You need enough light to see rocks, roots, dips, and turns, a beam pattern that covers the trail, and a battery that can last throughout your ride. Your lighting setup should also help other trail users and road users notice you.
For most mountain bikers riding unlit trails, a powerful handlebar light paired with a helmet-mounted light is a practical starting point. A separate rear light is useful when your route includes roads, shared paths, or other places where visibility from behind matters.
The best setup depends on your trail difficulty, riding speed, ride duration, budget, and whether you ride entirely off-road or combine mountain biking with road travel.
Table of Contents
Why Bike Lights Matter for Night Mountain Biking
Mountain bike trails can look very different after sunset. Rocks, tree roots, loose gravel, branches, and changes in elevation become harder to recognize when ambient light disappears. Shadows can also hide obstacles that would be easy to spot during daylight.
Good lighting helps you identify the trail surface, judge where to place your front wheel, and look ahead before reaching a corner or technical section. However, lights cannot eliminate every hazard or replace good riding judgment.
Your lights also serve a second purpose: helping other cyclists, pedestrians, and motorists see you. This becomes particularly important when traveling between trails on public roads.
1. Choose the Right Brightness for Your Trail
Brightness is commonly measured in lumens. Lumens indicate the total quantity of visible light emitted by a source, but they do not tell you exactly how far the beam reaches or how evenly it illuminates the ground.
A high-lumen light with a narrow beam may illuminate a distant point while leaving nearby roots and the edges of the trail relatively dark. A lower-output light with a well-designed beam may provide more useful coverage for slower riding.
For mountain biking, consider the terrain, speed, available ambient light, and the beam pattern rather than relying on the lumen number alone.
READ: Handlebar vs Helmet Bike Light: Pros, Cons & Which to Choose
How many lumens do you need?
As a practical shopping guide, consider these broad categories rather than treating them as universal safety standards:
- Under 500 lumens: More suitable for visibility, illuminated paths, slower riding, or use as a secondary light. This range may be insufficient as the only light on a completely dark, technical MTB trail.
- 500–1,000 lumens: May suit slower riding on relatively straightforward trails, particularly when the light has an effective beam pattern. Suitability depends heavily on the trail and riding conditions.
- 1,000–1,500 lumens: A useful range to investigate for regular night mountain biking, including many unlit trails. Beam quality and sustained output remain important.
- 1,500 lumens and above: Worth considering for faster riding, technical singletrack, and especially dark environments. Higher output can increase heat and battery consumption, and it does not automatically guarantee better visibility.
These are selection guidelines, not guarantees of safe riding. REI’s mountain biking guidance recommends considering lights around the 1,000-lumen level for regular night riding, while specialist MTB guidance emphasizes that beam shape matters alongside output.
Before buying, check whether the stated maximum brightness can be maintained for your planned ride or is available only in a short boost mode.
2. Understand Beam Patterns: Spot, Flood, and Combination
Beam pattern describes how light spreads across the ground. For mountain biking, this can be just as important as the maximum lumen rating.
Spot beam
A spot beam concentrates light into a relatively narrow area. It can help illuminate distant trail features, but a narrow beam may leave the sides of the path poorly lit.
This pattern can be useful when you need to see farther ahead, although it is not always ideal as your only light on twisty, technical trails.
Flood beam
A flood beam spreads light across a wider area. This helps illuminate the trail edges, nearby obstacles, and the surrounding terrain.
A broad beam can be especially helpful on singletrack with frequent turns, roots, and rocks. However, a very wide beam may not provide enough concentrated illumination at a distance.
Combination beam
A combination beam balances a focused central area with wider peripheral illumination. For many MTB riders, this is a practical option because it can reveal both distant trail features and nearby obstacles.
When comparing lights, look for beam photographs or manufacturer beam-pattern diagrams. Check whether the illuminated area is broad enough for corners and whether the central beam reaches far enough for your normal speed.
3. Decide Between Handlebar and Helmet Lights
Handlebar lights and helmet lights illuminate the trail from different positions. They are not interchangeable in every situation.
Handlebar-mounted lights
A handlebar light provides a relatively stable beam that follows the direction of your front wheel. It is useful for illuminating the path ahead, including the general line you intend to ride.
Advantages include:
- Stable illumination of the trail surface.
- Convenient mounting and removal.
- A suitable position for a broad, high-output beam.
- Less weight carried directly on your head.
One limitation is that the beam does not automatically follow your eyes. When you look toward the exit of a sharp turn, your handlebars may still point toward the entrance.
Helmet-mounted lights
A helmet light follows your head movement. It can illuminate corners, side trails, and obstacles you look toward before turning the bike.
Advantages include:
- Light directed toward your line of sight.
- Better flexibility when looking around corners.
- Useful supplemental illumination on technical terrain.
Potential drawbacks include additional weight on the helmet, reduced battery life at high output, and the need for secure mounting. Check that the light and its mount are compatible with your helmet and do not interfere with its fit or intended protective function.
Is using both lights worthwhile?
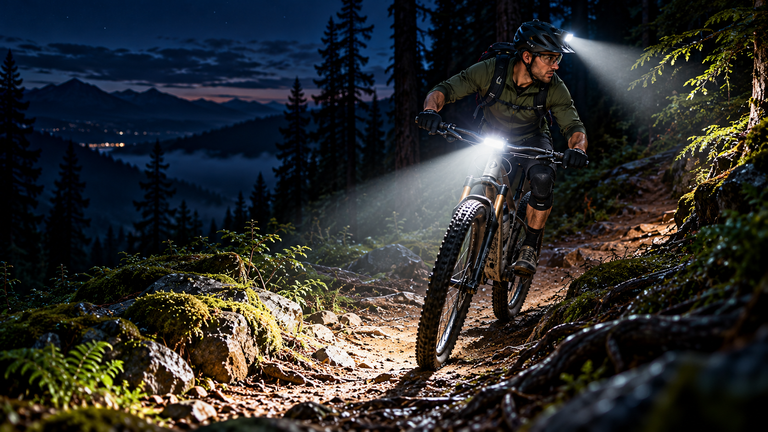
For regular night riding on unlit MTB trails, a handlebar light combined with a helmet light is a strong setup to consider. The handlebar unit illuminates the general trail, while the helmet unit helps direct light toward corners and features you are looking at.
British Cycling’s night-riding guidance also recommends a wide handlebar beam combined with a more focused helmet beam.
If your budget permits only one light, prioritize a suitable front light for your actual trail conditions. A helmet-mounted option may be particularly versatile for technical riding, but it should be securely fitted and comfortable enough for the duration of the ride.
4. Check Battery Life and Realistic Runtime
A light that becomes dim or runs out of power before you finish your ride can leave you poorly prepared for the return journey.
Manufacturers usually list runtime for different brightness modes. Maximum-output runtime may be much shorter than the duration available on a low setting.
Before purchasing, consider these factors:
- Ride duration: Estimate the total time you will spend riding, including the return trip and reasonable delays.
- Brightness mode: Check the stated runtime at the output level you actually intend to use.
- Battery capacity: Compare the battery specifications and manufacturer runtime claims.
- Charging method: Confirm that the charging cable and power source suit your needs.
- Low-battery warnings: A clear warning can help you respond before the light shuts off.
- Backup lighting: Carry a separate, charged backup light appropriate for your route.
Cold weather, battery age, and repeated charging can affect real-world performance. External battery packs may offer different weight and runtime trade-offs from lights with integrated batteries.
For a longer ride, avoid planning around the manufacturer’s best-case runtime alone. Allow a margin for delays, unexpected route changes, and periods when you need higher brightness.
5. Choose a Durable, Weather-Resistant Light
Mountain bike lights may be exposed to mud, rain, dust, vibration, and impacts. A model designed primarily for short urban rides may not be the best choice for demanding off-road conditions.
Look for a clearly stated water-resistance rating and check the manufacturer’s explanation of what that rating covers. Water resistance does not necessarily mean a light can be submerged, washed with a pressure washer, or used with exposed charging ports.
Also inspect the following:
- Housing: A robust construction can better withstand routine trail use.
- Mounting hardware: The light should remain secure over rough surfaces.
- Controls: Buttons should be accessible without creating a distraction.
- Charging-port cover: Check that it closes properly before riding in wet conditions.
- Temperature management: High-output lights may reduce brightness or become hot during prolonged use.
Follow the manufacturer’s cleaning, charging, and storage instructions. If a light has been damaged or its battery enclosure is compromised, stop using it until the problem has been assessed.
6. Look for a Secure and Compatible Mount
A light is only useful when it stays in position. Rough terrain, repeated impacts, and vibration can cause a poorly secured unit to shift or detach.
For a handlebar light, check the diameter range supported by the mount and confirm that it fits your handlebar. Also make sure the light does not interfere with brake levers, shifters, cables, or other cockpit equipment.
For a helmet light, verify compatibility with the helmet and use the intended mounting system. If the manufacturer recommends a retention tether, fit it as directed.
Before every ride, check that the mount is tight, the light is aligned correctly, and the controls are accessible. A quick test over a short, safe section can help reveal movement before you enter a remote trail.
7. Do Not Forget Rear and Side Visibility
A bright front light helps you see and can make you more noticeable from the front, but it does not provide the same visibility from behind.
A rear light is useful if your route includes public roads, shared paths, trail access roads, or areas where other riders may approach from behind. Reflective clothing and reflective accessories can provide additional visibility when illuminated by another light source.
Consider these features when selecting a rear light:
- A secure seatpost, frame, or backpack mounting option.
- A visible output appropriate for the riding environment.
- A battery runtime that covers the entire trip.
- A weather-resistance rating suitable for expected conditions.
Use a steady rear light or a flashing mode where appropriate and legally permitted. Check local cycling rules, because lighting requirements can differ by jurisdiction. Avoid lighting arrangements that create excessive glare or distract other trail users.
8. Compare Light Modes and Controls
Multiple brightness settings can help you balance visibility with battery life.
A high setting may be useful on a dark, technical descent, while a lower setting may be sufficient on a familiar, smoother section. Some models offer a temporary boost mode, a low-battery indicator, or a battery-status display.
Choose controls that are easy to understand and operate without taking unnecessary attention away from the trail. If changing modes requires complicated button sequences, learn them before riding.
Do not assume that a light’s brightest mode is always the best setting. Excessive brightness can create glare for approaching riders, particularly when a helmet-mounted beam points directly toward someone’s face.
9. Match Your Light Setup to Your Riding Style
Different riding conditions call for different lighting priorities.
For beginner MTB riders
Choose a dependable front light with a useful, reasonably wide beam and sufficient runtime for your planned route. Start with familiar trails, reduce speed, and avoid technical terrain until you can clearly recognize obstacles under your lighting setup.
For technical singletrack
Prioritize beam coverage, visibility around corners, and reliable mounting. A combination of handlebar and helmet lights can be especially useful because each illuminates the trail from a different direction.
For long-distance night rides
Runtime and backup lighting deserve particular attention. Compare realistic battery performance, charging requirements, and the availability of lower-output modes that remain useful for less demanding sections.
For rides that include public roads
Consider front and rear visibility, reflective accessories, glare control, and local legal requirements. A trail-focused front light may be powerful, but its beam should be aimed responsibly when other road users are nearby.
10. Set Up and Test Your Lights Before Riding
Buying the right light is only part of the process. Proper setup helps you use it effectively.
Follow these steps before your first night ride:
- Charge the batteries: Start with a full charge and check for damage to the charging cable or battery enclosure.
- Secure the mounts: Attach the lights according to the manufacturer’s instructions and confirm that they do not move easily.
- Aim the front beam: Position it to illuminate the trail ahead without unnecessarily directing intense light into the eyes of approaching riders or road users.
- Test all modes: Confirm that the controls work and that any battery indicator behaves as expected.
- Check rear visibility: Make sure the rear light is visible from the intended direction and is not blocked by a bag or clothing.
- Take a short test ride: Use a familiar, safe area to evaluate beam coverage, mounting stability, and comfort.
- Recheck before departure: Confirm that all lights are charged and securely attached.
Do not ride faster than you can safely react to what your lights reveal. If you cannot identify obstacles early enough, slow down, improve the lighting setup, or choose a less demanding route.
Common Mistakes to Avoid When Choosing MTB Lights
Buying based only on lumens: Maximum output does not describe beam quality, sustained brightness, or runtime. Compare the full lighting performance.
Ignoring battery life: A powerful light that cannot last through the return trip may be unsuitable for your route.
Using only a narrow beam: A concentrated spot may illuminate distant objects but leave the trail edges poorly lit.
Neglecting rear visibility: Front illumination does not make you equally visible from behind.
Choosing an incompatible mount: A light that shifts or detaches on rough terrain can become ineffective or create a hazard.
Failing to test the setup: Check the beam and controls before entering a remote or technical trail.
Riding at normal daytime speed: Night conditions reduce the time available to recognize and respond to obstacles. Adjust your speed to the visible trail.
Frequently Asked Questions
How many lumens are best for night mountain biking?
There is no single ideal number for every rider. Lights around 1,000 lumens are a useful starting point to investigate for regular night MTB riding, while faster or more technical trails may justify higher output. Beam pattern, sustained brightness, terrain, and runtime are equally important.
Is a helmet light better than a handlebar light?
Neither is universally better. A handlebar light provides a stable beam over the trail, while a helmet light follows your line of sight. Using both can provide more flexible illumination for technical night riding.
Can I use a regular commuter bike light for MTB trails?
Some commuter lights can work for slower riding on relatively simple paths, but many are designed primarily to help other people see the cyclist rather than illuminate a dark trail. Check the output, beam pattern, runtime, and intended use before relying on one off-road.
Should I use a rear light when mountain biking at night?
A rear light is useful when riding on roads, shared paths, or other areas where people may approach from behind. Choose a suitable mounting position and follow local requirements for nighttime bicycle lighting.
How long should a mountain bike light last on one charge?
The required runtime depends on the length of your ride and the brightness setting. Check the manufacturer’s runtime figures for the specific mode you intend to use, then allow extra capacity for delays and unexpected changes.
Are two bike lights necessary for night riding?
Two front lights are not mandatory for every situation, but combining a handlebar light and a helmet light can improve coverage on dark, technical trails. At minimum, select a front light suited to your terrain and consider separate rear lighting whenever visibility from behind matters.
Conclusion
Learning how to choose bike lights starts with understanding your riding conditions. Look for a useful beam pattern, appropriate brightness, realistic battery runtime, secure mounting, and weather resistance. For regular night mountain biking, a broad handlebar beam paired with a helmet light is a practical combination to consider.
Do not overlook rear visibility, backup lighting, or careful beam adjustment. Most importantly, ride at a speed that allows you to identify obstacles and respond safely within the area illuminated by your lights.
One Comment