
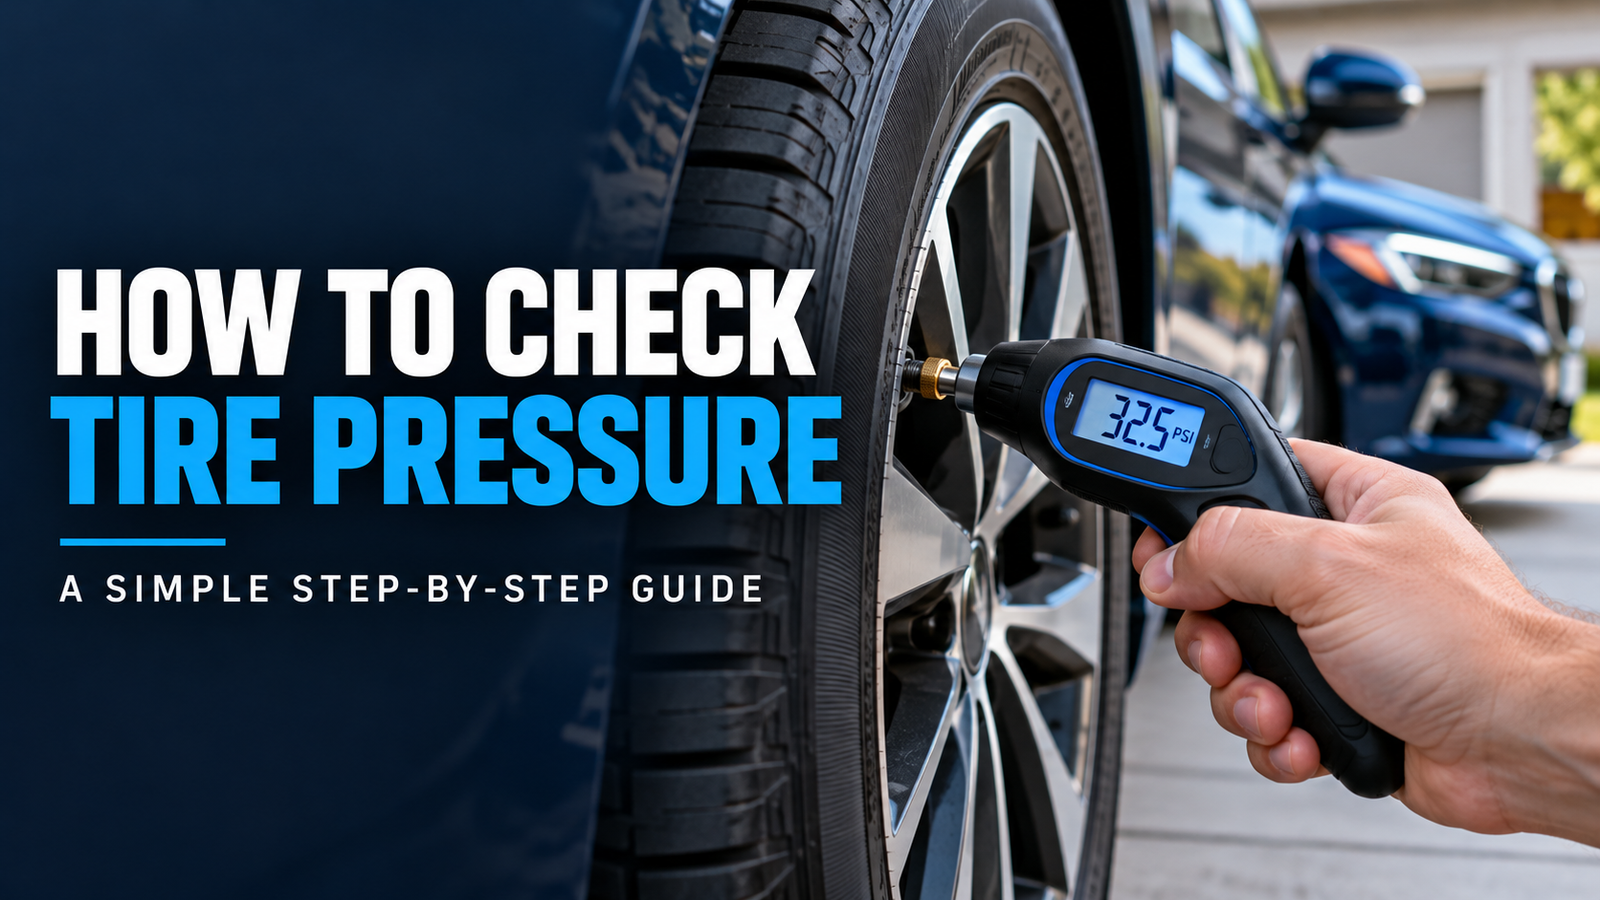
How to Check Tire Pressure: A Step-by-Step Guide
Knowing how to check tire pressure helps you maintain your tires, identify pressure loss early, and keep your vehicle operating as intended. The process is straightforward: find your vehicle manufacturer’s recommended pressure, measure each tire with a reliable tire pressure gauge, and add or release air as needed.
For the most accurate reading, check your tires when they are cold, ideally before driving or at least three hours after the vehicle has been parked. Use the recommended pressure on the driver’s door label or in your owner’s manual—not the maximum pressure printed on the tire sidewall.
You do not need an expensive tool to get started. A basic tire pressure gauge and access to an air compressor are generally enough to check and correct your tires at home or at a gas station.
Table of Contents
Why Checking Tire Pressure Matters
Tire pressure affects how a tire supports your vehicle and maintains contact with the road. When the pressure is too low or too high, the tire may not perform as intended.
Regular checks help you:
- Maintain predictable handling: Correct inflation helps your tires perform according to the vehicle manufacturer’s design.
- Support braking and traction: Incorrect pressure can affect how the tires interact with the road.
- Reduce unnecessary tire wear: Underinflation and overinflation can contribute to uneven or premature wear.
- Support fuel efficiency: Underinflated tires increase rolling resistance, which can mean your engine needs more energy to move the vehicle.
- Identify potential leaks: A tire that repeatedly loses pressure may have a puncture, a valve problem, or another issue requiring inspection.
The U.S. National Highway Traffic Safety Administration (NHTSA) recommends checking tire pressure at least monthly and before long trips. It also advises inspecting the spare tire.
What You Need to Check Tire Pressure
You can complete a routine tire pressure check with a few basic items.

1. Tire pressure gauge
A digital, dial, or pencil-style gauge measures the air pressure inside a tire. Choose a gauge with a readable scale that covers your vehicle’s recommended pressure range.

2. Air compressor or tire inflator
You will need an air source if a tire is below its recommended pressure. Options include a portable inflator or an air pump at a service station.

3. Valve caps and your vehicle’s pressure information
Keep the valve caps clean and available for reinstallation. Locate the tire information label or owner’s manual before beginning.
A separate gauge is useful even if your vehicle has a tire pressure monitoring system (TPMS). That system can warn you when pressure becomes significantly low, but it does not replace routine manual checks.
Step 1: Find Your Car’s Recommended Tire Pressure
Before measuring anything, determine the correct pressure for your particular vehicle.

Look in these places:
- Driver’s door jamb: Check the label on the door frame or pillar.
- Owner’s manual: Find the tire inflation or maintenance section.
- Manufacturer documentation: Consult the official guidance for your exact vehicle if the label is missing or unclear.
The label typically identifies the recommended cold inflation pressure for the front and rear tires. Depending on the vehicle, the specified pressures may differ.
For example, if your label specifies 35 PSI for the front tires and 33 PSI for the rear tires, follow those values rather than assuming all four tires need identical pressure. These numbers are illustrative only; use the values listed for your own vehicle.
Why you should not use the number on the tire sidewall
The tire sidewall may display a maximum inflation pressure or other tire specifications. That figure is not automatically the correct operating pressure for your vehicle.
The vehicle manufacturer selects the recommended pressure based on the vehicle’s design and requirements. Using the wrong reference can result in incorrect inflation.
Step 2: Check the Tires When They Are Cold
A cold tire check gives you a reading that can be compared with the vehicle’s recommended cold inflation pressure.
NHTSA defines cold tires as tires on a vehicle that has not been driven for at least three hours. For the most consistent results, check the vehicle before starting your day’s driving.
Why does this matter? Driving generates heat in the tires, and the air inside expands as it warms. Consequently, the pressure reading can be higher after driving than it would be when the tires are cold.
If you have already driven, do not assume that the higher reading means your tires are overinflated. Do not release air from warm tires simply to bring the reading down to the cold-pressure specification.
If you suspect a tire is dangerously underinflated, do not continue driving just to obtain a cold reading. Follow your vehicle manufacturer’s guidance and arrange safe assistance if necessary.
Step 3: Remove the Valve Cap
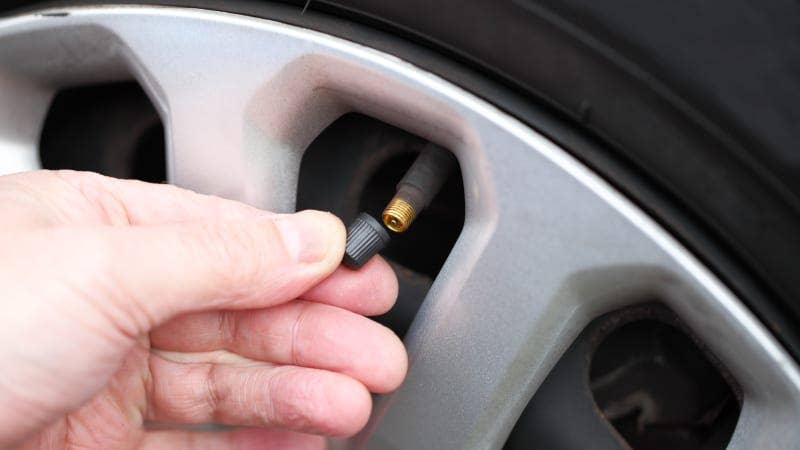
Park in a safe, level location away from moving traffic. Apply the parking brake and switch off the vehicle.
Next:
- Locate the valve stem on the wheel.
- Unscrew the small valve cap.
- Place the cap somewhere clean so it does not get lost.
- Check that the valve area is reasonably clean before attaching the gauge.
The valve stem is the small fitting through which air enters and leaves the tire. Avoid forcing the gauge onto it at an angle, as an improper connection can cause air to escape and produce an unreliable reading.
Step 4: Measure the Tire Pressure With a Gauge

Use the following procedure:
- Position the gauge squarely over the valve stem.
- Press it firmly enough to create a good seal.
- Hold it in place until the pressure reading appears.
- Remove the gauge and read the displayed value.
- If air escaped or the reading seems inconsistent, reposition the gauge and measure again.
- Record the result for that tire.
A digital gauge normally displays the reading on a screen. A dial gauge uses a needle, while a pencil-style gauge extends a graduated scale.
Pressure is commonly measured in pounds per square inch (PSI). Some gauges and vehicle labels use kilopascals (kPa) or bar. Make sure you compare readings in the same unit.
Repeat this process for each tire, including the spare if your vehicle has one. Do not assume that the tires have identical pressure simply because they look similar.
Step 5: Compare the Reading With the Recommended PSI
Now compare each measured reading with the correct cold-pressure specification from your vehicle’s label or owner’s manual.
Consider this illustrative example:
| Tire | Recommended cold pressure | Measured pressure | Action |
|---|---|---|---|
| Front left | 35 PSI | 31 PSI | Add air |
| Front right | 35 PSI | 35 PSI | No adjustment |
| Rear left | 33 PSI | 36 PSI | Recheck conditions; adjust if appropriate |
| Rear right | 33 PSI | 30 PSI | Add air |
Example only. These are not universal tire pressure recommendations.
Use the following general guide:
- Below the recommendation: Add air until the specified pressure is reached, using the appropriate cold-pressure target.
- At the recommendation: No adjustment is normally necessary if the reading is reliable and the tire is cold.
- Above the recommendation: Confirm that the tire is cold and that you are using the correct specification before making a small adjustment.
Front and rear pressures may differ. Some vehicles also specify different pressures for certain load conditions, so consult the manual rather than relying on a generic chart.
Step 6: Add Air if the Tire Pressure Is Too Low

If your tire is underinflated, use a suitable air compressor or portable tire inflator.
- Check the target pressure on your vehicle’s label or in the owner’s manual.
- Attach the inflator nozzle securely to the valve stem.
- Add air in short intervals, following the inflator’s instructions.
- Pause and measure the pressure with your gauge.
- Continue carefully until you reach the specified pressure.
- Remove the nozzle and take a final reading.
- Reinstall the valve cap.
Some air pumps allow you to set a target PSI and stop automatically. Even with these units, verify the final reading when possible, because equipment accuracy and connection quality can vary.
If you accidentally add too much air, correct it carefully while following the tire and equipment instructions. Recheck the pressure after each adjustment rather than releasing a large amount of air at once.
Important: If the tire is visibly damaged, has a bulge, or loses air rapidly, do not treat inflation as a permanent repair. Have it inspected by a qualified tire professional.
Step 7: What if the Tire Pressure Is Too High?
If a tire is overinflated relative to its specified cold pressure, first confirm that the tire is cold and that you have identified the correct target.
If the reading is still too high, release a small amount of air using the gauge’s pressure-release function or another suitable method permitted by the equipment instructions.
After each small release:
- Measure the pressure again.
- Compare it with the recommended specification.
- Repeat only if necessary.
- Reinstall the valve cap when finished.
Do not reduce pressure based on a warm reading alone. Tire pressure normally increases during driving, and releasing air while the tire is warm can leave it underinflated after cooling.
Step 8: Check All Four Tires and the Spare
One correctly inflated tire does not mean the whole vehicle is ready for the road.
Check every tire individually, including:
- Front-left tire
- Front-right tire
- Rear-left tire
- Rear-right tire
- Spare tire, if equipped
Check the spare’s own pressure requirements. Compact spares can have different specifications from the vehicle’s regular tires, so do not automatically use the normal tire pressure.
While checking, inspect the tread and sidewalls for cuts, cracks, punctures, embedded objects, unusual bulges, or uneven wear. NHTSA recommends regular tire inspections as part of tire maintenance.
If one tire repeatedly reads lower than the others, it may have a slow leak or another problem that needs professional inspection.
How Often Should You Check Tire Pressure?
For most everyday drivers, a good starting routine is to check tire pressure at least once a month and before long road trips. Check it more promptly if your vehicle displays a low-pressure warning, a tire appears to be losing air, or you notice possible tire damage.
Temperature changes also matter. Tire pressure generally decreases as the surrounding temperature falls, so a cold-weather change can lead to a different reading even if the tire has no puncture. Check the pressure and adjust it to the vehicle manufacturer’s specification.
Avoid relying only on visual inspection. A tire can be underinflated without looking obviously flat.
Common Tire Pressure Mistakes to Avoid
Even a simple pressure check can produce misleading results if you overlook a few details.
Using the tire sidewall number as the target
Follow the vehicle’s recommended inflation pressure, not automatically the maximum pressure printed on the tire.
Checking only by appearance
A tire may look normal while its pressure is below the recommended level. Use a reliable gauge.
Ignoring the cold-tire requirement
Heat from driving changes the reading. Measure cold pressure whenever possible.
Checking only one or two tires
Pressure can vary between tires. Measure each one separately, including the spare when applicable.
Ignoring recurring pressure loss
Frequently adding air to the same tire is not a substitute for finding the cause. A tire professional should inspect persistent pressure loss.
What to Do if Your Tire Pressure Warning Light Comes On
A tire pressure monitoring system (TPMS) warning means you should check the tires promptly. The exact warning behavior varies by vehicle, so consult the owner’s manual to understand the indicator.
Follow these steps:
- Park in a safe location and inspect the tires for visible damage.
- Measure the pressure in all tires with a gauge when safe to do so.
- Adjust the pressure according to the vehicle manufacturer’s instructions.
- If the warning persists, or one tire continues to lose air, seek professional assistance.
A warning light does not tell you exactly what caused the pressure problem. Do not assume that the issue has been resolved simply because the light goes out.
If a tire looks flat, has a pronounced bulge, or shows signs of significant damage, avoid driving on it. Arrange roadside assistance or professional inspection as appropriate.
When Should You Visit a Tire Professional?
Routine pressure checks are manageable for most drivers, but some situations require expert help.
Seek professional inspection if:
- A tire repeatedly loses pressure after inflation.
- You discover a nail, screw, or other object embedded in the tire.
- The sidewall has a cut, crack, or bulge.
- The vehicle vibrates unusually or the tires show uneven wear.
- You cannot determine the correct pressure from the vehicle documentation.
- The TPMS warning remains on after you have checked and corrected the pressure.
Do not remove an embedded object or attempt a repair without understanding the applicable repair requirements. Damage location, tire condition, and the manufacturer’s recommendations determine whether a tire can be repaired safely or needs replacement.
Frequently Asked Questions
1. How do I check tire pressure without a gauge?
You cannot reliably determine the exact tire pressure by looking at the tire or pressing on its sidewall. Use a suitable tire pressure gauge or visit a tire service facility that can measure it. Visual inspection remains useful for identifying obvious damage, but it is not a substitute for measuring pressure.
2. What PSI should my car tires be?
There is no single PSI value that applies to every car. Find the recommended cold tire pressure on the driver’s door label or in the owner’s manual. Follow the specified values for your vehicle and the relevant loading conditions.
3. Should I check tire pressure when the tires are hot or cold?
Check when the tires are cold, ideally before driving or after the vehicle has been parked for at least three hours. A warm tire can show a higher pressure because of heat generated during driving. Do not release air from a warm tire simply to match the cold-pressure specification.
4. How often should I check tire pressure?
Check at least monthly and before long journeys. Check sooner if you notice a low-pressure warning, possible damage, or unusual pressure loss. Vehicles and tire manufacturers may specify additional checks.
5. Can I check tire pressure at a gas station?
Yes. Many gas stations have air pumps with pressure gauges or adjustable inflation controls. Check the recommended pressure before using the pump, follow the equipment instructions, and verify the final reading where possible.
6. Why does my tire keep losing air?
Possible causes include a puncture, a leaking valve, a poor seal between the tire and wheel, or other damage. Temperature changes can also affect pressure readings. If the same tire repeatedly loses air, have it inspected rather than continually topping it up.
7. Is the recommended pressure the same for front and rear tires?
Not always. The vehicle manufacturer may specify different front and rear pressures, or different recommendations for particular load conditions. Check the information for your vehicle rather than assuming all tires should have the same PSI.
8. Does a TPMS warning mean I have a flat tire?
Not necessarily. A low-pressure warning can indicate that one or more tires need attention, but it does not by itself establish the cause or severity. Check the tires safely and follow the owner’s manual. If a tire appears damaged or significantly deflated, do not continue driving on it.
Conclusion
Learning how to check tire pressure is a straightforward way to stay on top of routine vehicle maintenance. Use a reliable gauge, check the tires when cold, and follow the recommended PSI on your vehicle’s information label or in its owner’s manual.
Make the check part of your monthly maintenance routine and repeat it before long journeys. Inspect for visible damage, pay attention to recurring pressure loss, and consult a tire professional when a problem cannot be resolved safely.
A few minutes of regular attention can help you identify tire problems earlier and keep your vehicle’s tires inflated according to the manufacturer’s recommendations.


One Comment